Enhancing Your WordPress Site can bring improved performance, better security, and potential cost savings. By following a structured migration process, you ensure a smooth transition to a new server, keeping your site functional and ready for future growth.
Moving a WordPress site to another server can feel a bit like packing up your entire house for a big move. It’s exciting but also a little nerve-wracking. We want our new place to be just as cozy and functional as the last one. With the right steps, we can make this transition smooth and easy. Imagine transferring your favorite toys without losing any along the way. Did you know that 30% of website migrations hit snags? That’s where Add A Little Digital comes in to help us avoid those pitfalls. Let’s dive into how we can tackle this project together and ensure our site shines in its new home.
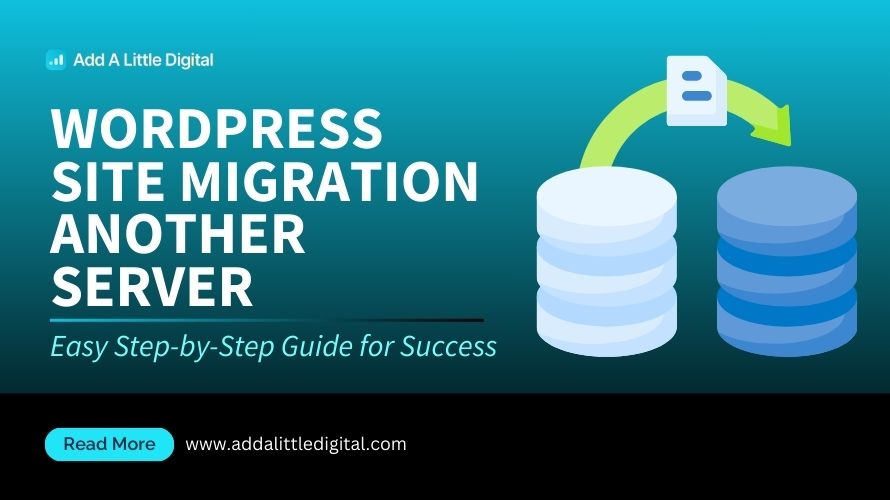
Understanding WordPress Site Migration
WordPress site migration refers to the process of transferring a WordPress website from one server to another. This process involves moving files and databases, ensuring the site functions correctly on its new host. Understanding this concept is crucial for business owners looking to streamline their online presence.
What Is WordPress Site Migration?
WordPress site migration is the technique of relocating a WordPress website from one hosting environment to another. This may include moving to a new hosting provider, changing domain names, or transitioning from a local server to a public server. Migrations might seem challenging, yet they offer numerous benefits when done correctly. Key components include backing up the site, transferring files, and updating configuration settings.
Why Migrate Your WordPress Site?
Migrating our WordPress site can enhance performance and reliability, providing numerous advantages. Enhanced speed on a modern host can improve user experience and SEO rankings. Additionally, a new server may offer better security features, protecting our site from potential threats. Cost savings may also arise by choosing a more affordable hosting plan that meets our needs.
Step-by-Step Guide to Migrating Our WordPress Site
- Choose a New Hosting Provider
Evaluate and select a reliable hosting provider that better suits our website’s demands.
- Backup Our Current Site
Use plugins like UpdraftPlus to create a complete backup of files and databases for safety.
- Export the WordPress Database
Access the current database through cPanel or phpMyAdmin. Use the export feature to save the database as an SQL file.
- Download WordPress Files
Connect to the original server via FTP. Download all WordPress files to our local machine for transfer.
- Upload Files to New Server
Use FTP again to upload the previously downloaded WordPress files to the new server directory, usually located in the public_html folder.
- Create a New Database
On the new server, create a new MySQL database and user via cPanel. Grant the user all privileges to this database.
- Import the Old Database
Access the new server’s phpMyAdmin, select our new database, and import the SQL file saved earlier.
- Update the wp-config.php File
Edit the wp-config.php file on the new server to reflect the new database name, user, and password.
- Test the Website
Before making the migration live, test the new server’s URL to confirm that everything operates correctly and all content is in place.
- Update DNS Records
Once satisfied, update the domain’s DNS settings to point to the new server’s IP address, completing the migration.
By following these steps, we can execute a successful WordPress site migration with minimal disruption, ensuring business continuity. While the WordPress site migration process may seem overwhelming at first, taking it one step at a time can lead us to a seamless transition.
For further guidance on this topic, we can consult resources like WPBeginner, Kinsta, or SiteGround to gain additional insights and practices. Let’s ensure every aspect of our site’s new home feels familiar and functions effectively.
Preparing for Migration
Preparing for a WordPress site migration to another server involves several critical steps. We can streamline this process to ensure efficiency and minimal downtime.
1. Backup Your WordPress Site
- Access Your Hosting Account. Log into your current hosting provider’s control panel.
- Use a Backup Plugin. Install a reliable backup plugin like UpdraftPlus or BackupBuddy.
- Create a Full Backup. Run the plugin to create a complete backup of files and your database.
- Download Backup Files. Save the backup files to your local computer or an external drive.
- Verify Backup Integrity. Ensure all backup files are intact and accessible.
- Schedule Regular Backups. Set automated backups for the future to safeguard your site.
2. Choosing a New Hosting Provider
- Determine Your Hosting Needs. Assess the size, traffic, and performance expectations of your WordPress site.
- Research Hosting Options. Compare several providers such as SiteGround, Bluehost, or WP Engine.
- Check Customer Reviews. Read customer feedback to gauge reliability and support quality.
- Evaluate Pricing Plans. Ensure the hosting provider fits within your budget while offering necessary features.
- Look for Migration Assistance. Choose providers that offer free migrations or support with your WordPress site migration.
- Confirm Uptime Guarantees. Select a host that guarantees at least 99.9% uptime for a reliable online presence.
- Contact Customer Support. Reach out with questions to test their responsiveness and knowledge.
- Finalize the Decision. Make a choice based on the evaluations and sign up for the new hosting plan.
Selecting the right hosting provider is crucial for a successful WordPress site migration, as it directly affects performance, security, and overall user experience.
By following these steps, we ensure a smooth transition during the WordPress site migration process to another server, addressing both immediate and future needs effectively.
The Migration Process
Successful WordPress site migration to another server involves several key steps. We’ll walk through each step in detail, ensuring it’s straightforward and efficient for busy business owners.
1. Choose a New Hosting Provider
Identify the right hosting provider. Evaluate performance, security, and pricing. Read reviews and compare features. Ensure they support WordPress and offer good customer support. Making the right choice impacts our site’s future performance.
2. Back Up Your Current Site
Back up the entire WordPress site. Access your hosting account or use a backup plugin. Create a full backup that includes both files and the database. Verify that the backup works correctly. This step is crucial to prevent data loss during migration.
3. Export the Database
Access the current hosting’s control panel. Navigate to phpMyAdmin and select your database. Click on the “Export” tab and choose the “Quick” option. Save the database file to your computer. This file contains essential data for our site.
4. Download Files via FTP
Use an FTP client like FileZilla. Connect to your old server using FTP credentials. Download all WordPress files, including the wp-content folder. This process ensures we have every necessary file for the migration.
5. Upload Files to the New Server
Connect to the new server with the FTP client. Upload the previously downloaded WordPress files to the new server’s directory. Maintain the same structure as the old site. This ensures all files and folders are in their correct places.
6. Create a New Database
Access the new hosting control panel. Create a new database and a user with permissions. Record the database name, username, and password. This database becomes the new home for our site’s data.
7. Import the Old Database
In the new server’s control panel, navigate to phpMyAdmin. Select the newly created database. Click on the “Import” tab and upload the database file from step three. This action transfers our site’s data to the new location.
8. Update the wp-config.php File
Locate the wp-config.php file within the WordPress files on the new server. Update the database name, username, and password to match the new database settings. This step links our site to the new database.
9. Test the Website
Before updating DNS records, test the site using a temporary URL provided by the new host. Check all pages and functionalities. Ensure everything works as expected. This step helps identify potential issues early on.
10. Update DNS Records
Once testing is complete, access the domain registrar account. Update the DNS records to point to the new server’s IP address. Allow time for propagation. After this step, our visitors can access the site on the new server.
By following these steps for a WordPress site migration to another server, we can ensure a smooth transition with minimal downtime. We understand that time is valuable for business owners, so we’ve made the process clear and actionable. For further assistance, explore resources from WordPress Codex, WP Beginner Guides, or Kinsta’s Migration Checklist.
Post-Migration Tasks
After migrating our WordPress site to another server, we must complete specific tasks to ensure everything functions properly on the new environment. This section provides clear, actionable steps for updating DNS settings and testing the site, helping us avoid potential issues.
1. Updating DNS Settings
- Access Domain Registrar
Log in to our domain registrar account where we purchased our domain name.
- Locate DNS Management
Navigate to the DNS management section. This area allows us to change our domain’s nameservers or DNS records.
- Update the Nameservers
If we switched to a new hosting provider, enter the new nameservers provided by that provider. It typically looks like ns1.newhosting.com and ns2.newhosting.com.
- Adjust A Records
If we prefer to use the existing nameservers, edit the A records. Point the A record to the new server’s IP address to direct traffic to our WordPress site.
- Save Changes
After making updates, save the changes. Most registrars may take a few minutes to propagate the new settings.
- Check Propagation Status
Use online tools like DNS Checker to monitor when our DNS changes take effect. This process might take up to 48 hours.
- Monitor Website Access
Once propagation is complete, ensure we can access our site using the domain name.
2. Testing Your Site on the New Server
- Clear Browser Cache
Clearing our browser cache ensures we’re viewing the latest version of the site, not a cached version from the old server.
- Access the Site via the Domain
Type our domain name in the browser to check if the site loads completely. Focus on loading times and page responsiveness.
- Check Links and Functionality
Navigate through different pages and check various functionalities like contact forms or payment gateways. Ensure everything operates seamlessly.
- Review Media and Images
Verify that all images and media load properly. Broken links or missing images indicate potential issues during migration.
- Test Admin Dashboard
Log into the WordPress admin dashboard. Check for any error messages and ensure all plugins and themes are functioning correctly.
- Use a Website Testing Tool
Utilize tools like GTmetrix or Pingdom to test site speed. Assess performance metrics to ensure our WordPress site runs efficiently on the new server.
- Monitor Analytics Setup
Confirm our analytics setup works correctly. Check that tracking codes lead to accurate data collection.
By completing these post-migration tasks, we enhance our chances for a smooth transition to the new server. Following the steps outlined above minimizes potential disruptions and ensures our WordPress site remains accessible and functional. For additional resources, we may consider checking the WordPress Codex or WP Beginner Guides for more insights on site management.
Common Issues and Troubleshooting
Migrating a WordPress site to another server can present various challenges. Recognizing these common issues can aid in achieving a smoother transition. Here, we outline the key problems and solutions.
1. Broken Links and Missing Images
- Review Site Content: After migration, browse through your site to check all pages. Look for broken links and missing images. These can occur due to incorrect paths.
- Use a Search Tool: Utilize a tool to search for broken links. Tools like Broken Link Check can help identify problematic links quickly.
- Update Links: Correct any broken links by updating them in your WordPress dashboard. Go to the page or post editor, and replace the old URL with the new one.
- Regenerate Thumbnails: If images are missing, we may need to regenerate thumbnails. Use a plugin such as Regenerate Thumbnails to restore missing images.
- Check Media Library: Ensure all media had transferred correctly during migration. If any images are still missing, re-upload them from your backup.
- Clear Cache: Clear your site cache and browser cache after adjustments. This helps display updates instantly.
- Test Links Again: After making changes, test all links again to ensure there are no remaining broken links.
By following these steps, we can resolve broken links and missing images effectively.
2. Database Connection Errors
-
Check wp-config.php: Verify that the database credentials in your
wp-config.phpfile are correct. Incorrect username, password, or database name can lead to connection errors. -
Confirm Database Server: Ensure your new server’s database server matches what’s used by your old host. Usually, this is
localhost, but some hosts may require a specific server address. - Test Database Connection: If issues persist, create a simple PHP script to test the database connection. This checks whether your credentials function outside WordPress.
- Review User Privileges: Confirm that the database user has adequate privileges. The user must have permission to access and modify the database.
- Check Database Status: Use the hosting control panel to check the database status. It should be active without issues.
- Look for Duplicates: Avoid duplicate database instances on the new server. Extra databases can cause confusion and errors.
- Repair the Database: If errors still appear, consider repairing the database. Many hosting providers include a repair tool via their control panel.
- Contact Support: If connectivity issues persist after these steps, reach out to your hosting provider’s support team. They often provide support for typical migration-related issues.
Following this checklist can help resolve database connection errors effectively. Keeping our database connections stable ensures our WordPress site runs smoothly on the new server.
Key Takeaways
- Understand WordPress Site Migration: This involves transferring a website and its data from one server to another, requiring proper backup and configuration adjustments to maintain functionality.
- Backup Your Site: Before migrating, create a full backup using reliable plugins to prevent data loss and ensure a safe recovery option.
- Select the Right Hosting Provider: Evaluate potential hosts based on performance, features, support, and pricing to find the best fit for your site’s needs.
- Follow Step-by-Step Migration Process: Execute the migration in organized steps: backing up, exporting databases, downloading files, uploading to the new server, and testing before updating DNS.
- Post-Migration Testing: After migration, verify that all content, links, and functionalities work correctly on the new server to ensure a smooth user experience.
- Troubleshoot Common Issues: Be prepared to address problems like broken links or database connection errors by following troubleshooting guidelines, ensuring your site operates smoothly after the move.
Conclusion
Successfully migrating our WordPress site to a new server can open up new possibilities for improved performance and security. By taking the time to follow each step carefully we can minimize downtime and avoid common pitfalls that often arise during the process.
It’s crucial to remember that preparation is key. With the right resources and a clear plan in place we can ensure our site transitions smoothly.
After the migration we should keep an eye on our site’s functionality and performance. This vigilance helps us address any issues quickly and maintain a seamless experience for our visitors. Embracing this journey not only enhances our online presence but also sets the stage for future growth.
Frequently Asked Questions
What is WordPress site migration?
Migrating a WordPress site involves transferring all files and databases from one server to another, ensuring the website functions correctly on the new host. This process is essential for improving performance, security, and cost-effectiveness.
Why should I migrate my WordPress site?
Migrating your WordPress site can enhance performance, boost security, and potentially save costs. It allows you to move to a better hosting provider that meets your business needs and optimizes user experience.
What are the first steps for a successful migration?
Start by choosing a new hosting provider based on your needs, researching options, checking reviews, and confirming uptime guarantees. Then, back up your current site to avoid data loss during the transition.
How do I back up my WordPress site?
To back up your WordPress site, access your hosting account, use a backup plugin, create a full backup of your files and database, and ensure that the backup is intact before proceeding with the migration.
What are the key steps in the migration process?
The main steps include choosing a new host, backing up your site, exporting the database, downloading files, uploading to the new server, creating a new database, importing the old database, updating settings, and testing the site.
How do I update my DNS settings after migration?
To update DNS settings, log into your domain registrar’s account, locate the DNS management area, update nameservers or A records as necessary, and monitor the propagation status to ensure updates take effect.
What should I do if I encounter issues after migration?
If you face issues such as broken links or missing images, review your site content, update links, and regenerate thumbnails. For database connection errors, check the wp-config.php file and verify database settings.
How can I test my WordPress site after migration?
After migration, clear your browser cache, check site functionality, review media, and access the admin dashboard. Utilize website testing tools to assess performance and ensure everything works smoothly on the new server.
Where can I find additional resources for WordPress migration?
For more guidance on WordPress migration, consult resources like the WordPress Codex, WP Beginner Guides, and Kinsta’s Migration Checklist. They provide valuable tips and checklists to ensure a successful move.
Leave a Reply