Understanding WooCommerce
- Install WordPress
We start by installing WordPress on our chosen hosting platform. This step lays the groundwork for our eCommerce site. Without WordPress, WooCommerce can’t function properly.
- Install WooCommerce Plugin
Next, we log into our WordPress dashboard. In the “Plugins” section, we search for “WooCommerce” and click “Install Now.” Activating the WooCommerce plugin transforms our WordPress site into an online store.
- Follow the Setup Wizard
A setup wizard prompts us to configure basic settings. We enter key details such as our store location, currency, and payment options. Completing this wizard is crucial for personalized functionality.
- Configure Payment Methods
After that, we navigate to the WooCommerce settings. We select “Payments” to choose our preferred payment gateways. Options include PayPal and credit cards, ensuring we accommodate various customer preferences.
- Set Up Shipping Options
We proceed to the “Shipping” tab to organize shipping methods. We can define shipping zones and rates, allowing customers to see accurate shipping costs at checkout. Proper shipping setup enhances customer satisfaction.
- Add Products
We go to the “Products” section and click “Add New.” We input product details, including names, descriptions, prices, and images. Quality product listings boost our store’s visibility and conversion rates.
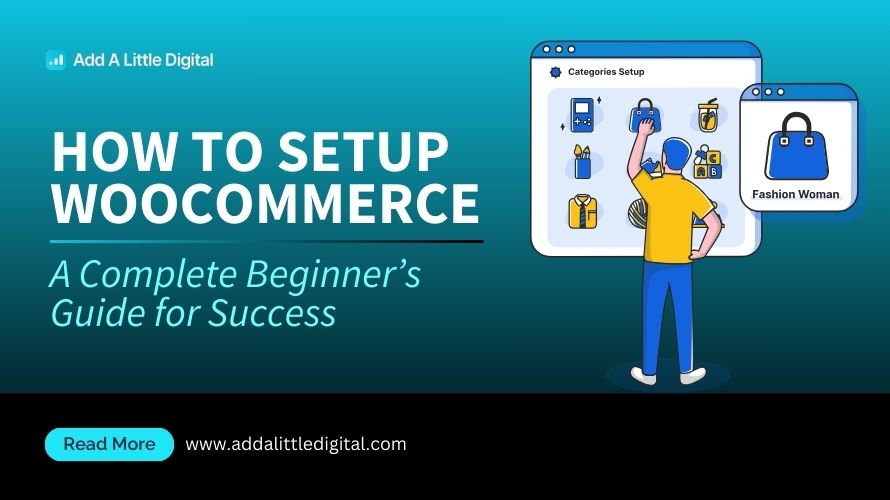
- Organize Product Categories
We create product categories to improve navigation. Categorizing products helps customers find what they need quickly. This organization enhances the shopping experience on our WooCommerce store.
- Customize Store Appearance
Customization comes next. We choose a theme that reflects our brand. Adjusting colors, fonts, and layouts creates a visually appealing storefront for our visitors.
- Test the Purchase Process
Before launching, we conduct a test purchase. This step ensures the payment system functions as expected. A smooth checkout process encourages more sales and customer retention.
- Launch Our Store
Finally, we promote our WooCommerce store. We utilize social media, email marketing, and SEO strategies. Effective promotion drives traffic and engagement, leading to increased sales.
By following these straightforward steps, we set up and customize our WooCommerce store efficiently. Each step plays a vital role in establishing a successful online business, ensuring we reach our target audience effectively while maximizing our store’s potential.
Installation Process
Setting up WooCommerce begins with a few crucial steps. We’ll guide you through the process to ensure you get your online store running smoothly.
System Requirements
- Check Hosting Compatibility: Ensure your hosting provider supports PHP version 7.2 or higher, MySQL version 5.6 or greater, or MariaDB version 10.0 or greater.
- Verify HTTPS Connection: Install an SSL certificate to secure transactions on your WooCommerce store.
- Confirm WordPress Installation: Install the latest version of WordPress, which is essential for WooCommerce functionality.
- Review Plugin Support: Although WooCommerce can run alongside most plugins, verify that existing plugins don’t conflict with WooCommerce operations.
Installing WordPress
- Select a Hosting Provider: Choose a hosting service that offers one-click WordPress installation, such as Bluehost, SiteGround, or WP Engine.
- Access the Control Panel: Log in to your hosting account and visit the control panel or dashboard.
- Initiate WordPress Installation: Locate the icon or link for WordPress installation and follow the prompts to install.
- Create Admin Account: Set up an admin account with a strong password and login details for your new WordPress site.
- Configure Basic Settings: After installation, adjust settings such as site title, tagline, and permalink structure for better SEO.
Installing WooCommerce Plugin
- Navigate to Plugins Menu: From your WordPress dashboard, go to the “Plugins” section, and select “Add New.”
- Search for WooCommerce: Enter “WooCommerce” in the search bar and press Enter.
- Install and Activate: Click on the “Install Now” button, followed by “Activate” after the installation completes.
- Run the Setup Wizard: After activation, WooCommerce prompts a setup wizard. Follow these steps:
- Select your store’s location.
- Choose the currency that fits your business.
- Set up payment options, ensuring to include relevant methods like PayPal or Stripe.
- Configure Shipping Options: Set shipping zones and rates based on your target market’s needs. This step leads directly to improved customer satisfaction.
- Finalize Settings: Review other settings like tax options and product types. It’s vital that all configurations meet business requirements.
With these steps completed, your WooCommerce store setup progresses, positioning you to manage products, customize your store’s appearance, and prepare for launch. For further resources, check out WooCommerce documentation or set up business online for additional support.
Configuring WooCommerce Settings
Configuring WooCommerce settings is crucial for optimizing our online store’s performance. This section will guide us through the essential settings to adjust in WooCommerce to improve functionality and user experience.
General Settings
- Access WooCommerce Settings: From the WordPress dashboard, click on “WooCommerce” and then select “Settings.” This action opens the general settings page.
- Set Store Address: In the “General” tab, enter our store’s address. This information impacts shipping calculations and taxes.
- Choose Currency Options: Select our preferred currency from the dropdown menu. This currency will display on our storefront for transactions.
- Adjust Selling Locations: Specify the countries where we’ll sell our products. By default, WooCommerce allows sales only within our configured countries.
- Enable Customer Registration: Check the boxes to allow customers to create accounts during checkout. This option enhances user experience and allows us to manage customer data effectively.
Product Settings
- Access Product Settings: In the WooCommerce settings menu, click on the “Products” tab to adjust settings specific to our products.
- Configure Product Types: Decide on product types—simple, grouped, or variable—based on our inventory. Each type serves different purposes for our offerings.
- Set Inventory Options: Enable stock management by checking the stock management box. This feature aids in tracking our product inventory effectively.
- Activate Reviews: Opt to enable product reviews by customers. Customer feedback can significantly boost trust and encourage further purchases.
- Define Catalog Visibility: Choose whether to display products on the shop page or hide them until specific conditions are met. This option helps control visibility as we set up our store.
Payment Gateways
- Navigate to Payment Settings: Click on the “Payments” tab in the WooCommerce settings to configure payment gateways available for our store.
- Select Payment Methods: Review the list of available payment methods such as PayPal, Stripe, and direct bank transfers. Activate the payment methods we plan to offer.
- Configure Payment Gateway Settings: For each selected payment method, click on “Manage” to configure specific settings. This includes entering API keys for services like PayPal and Stripe.
- Set Up Testing Mode: Enable sandbox mode for payment gateways initially. This setup allows us to test transactions without billing actual customer accounts.
- Save Payment Changes: After configuring all payment gateways, save the changes by clicking on the “Save changes” button.
Shipping Options
- Go to Shipping Settings: Click on the “Shipping” tab in WooCommerce settings to set up our shipping options.
- Add Shipping Zones: Click “Add Shipping Zone” to create specific regions where we offer shipping. Each zone can have different shipping methods.
- Set Shipping Methods: Within each zone, select shipping methods like Flat Rate, Free Shipping, or Local Pickup. Define the respective costs and conditions for each.
- Configure Shipping Classes: If we have products that require unique shipping rates, create shipping classes to organize similar items. Assign these classes to the relevant products for accuracy.
- Save Shipping Settings: After setting up all shipping zones and methods, ensure to click on “Save changes” to apply our configurations.
By following these steps, we can effectively configure our WooCommerce settings, improving our store’s overall performance and customer satisfaction. These settings enhance usability and streamline the purchasing process for our customers, making our WooCommerce store ready for business.
Adding Products to Your Store
Adding products to your WooCommerce store is essential for showcasing what we offer. We can follow these straightforward steps to add both simple and variable products effectively.
Simple Products
- Access the Product Dashboard
Navigate to the WooCommerce section in our WordPress dashboard and click on “Products.”
- Add New Product
Click the “Add New” button to start creating a simple product.
- Set Product Name
Enter a clear and descriptive product name that reflects its features. This helps improve our SEO.
- Write Product Description
Provide a detailed description highlighting the benefits of the product. Use keywords naturally to improve visibility.
- Set Product Data
In the “Product Data” section, select “Simple Product” from the dropdown menu. This categorizes the product type effectively.
- Add Pricing Information
Enter the regular price and, if applicable, set a sale price. Clear pricing supports purchasing decisions.
- Upload Product Images
Upload high-quality images that showcase the product. Quality visuals enhance customer engagement and trust.
- Assign Categories and Tags
Organize products into relevant categories and add tags. This improves navigation and aids in SEO.
- Review and Publish
Review all entered information. Once satisfied, hit the “Publish” button to make the product live on our store.
- Test Visibility
Visit the store front to confirm that the product appears correctly. Ensure customers can find it without issues.
Variable Products
- Start with Product Dashboard
Navigate to the WooCommerce product section, just like with simple products.
- Select Add New Product
Click “Add New” to start setting up a variable product.
- Name the Product
Provide a descriptive name for the variable product, keeping SEO in mind.
- Choose Variable Product Type
In the “Product Data” section, select “Variable Product” to indicate multiple variations.
- Add Attributes
Click on the “Attributes” tab to define variations. For example, color sizes or other identifiers work well.
- Configure Variations
Move to the “Variations” tab. Here we can create different combinations based on the attributes defined earlier.
- Set Individual Pricing
For each variation entered, set individual prices, stock status, and images. This allows for tailored customer options.
- Upload Images for Variations
Add unique images for each variation, ensuring customers see what they’re purchasing.
- Write an Engaging Description
Include a detailed description of the variable product. Highlight what sets the variations apart.
- Publish the Product
Once all aspects are set, hit “Publish.” Verify that all variations are clearly visible and functional on the store.
By following these steps, we can efficiently add simple and variable products to our WooCommerce store, creating an attractive and functional shopping experience. Remember, wisely chosen keywords throughout these steps ensure effective visibility in search engines, making it easier for potential customers to find our products online. For more on optimizing our online store, check out How to Optimize Store and Set Up Business for guidance on maximizing our digital presence.
Customizing Your WooCommerce Store
Customizing your WooCommerce store enhances your brand’s identity and improves the shopping experience for customers. We can follow these steps to ensure a well-configured and visually appealing store.
Selecting a Theme
- Visit the WordPress Dashboard.
Go to the ‘Appearance’ menu and click on ‘Themes.’
- Search for WooCommerce-Compatible Themes.
Click on ‘Add New’ and use the search bar to find themes specifically designed for WooCommerce.
- Explore Theme Options.
Browse through the available themes, checking demos and reviewing ratings to ensure quality.
- Install Your Chosen Theme.
Click ‘Install’ on the preferred theme and then ‘Activate’ it to apply.
- Customize Theme Settings.
Access the ‘Customize’ section in the Appearance menu, adjusting options such as colors, fonts, and layout as needed.
- Preview Changes.
Check how your changes look in real time using the preview functionality, ensuring everything aligns with your brand.
- Save Customizations.
Once satisfied with your adjustments, click ‘Publish’ to make them live on your store.
- Regularly Update Your Theme.
Keep your theme updated to ensure compatibility and security.
Customizing Pages
- Navigate to WooCommerce Settings.
Go to the ‘WooCommerce’ menu in your WordPress dashboard and click on ‘Settings.’
- Edit General Page Settings.
On the General tab, define your store address and choose currency settings relevant to your business.
- Set Up Product Pages.
Click on the Products tab to customize product settings. Choose how products are displayed: in a grid or list view.
- Refine Checkout Pages.
Access the ‘Checkout’ tab to configure the checkout process, including fields like billing, shipping, and payment options.
- Customize Thank You Pages.
Modify the Thank You page to include additional information or promotions, enhancing customer satisfaction after purchase.
- Add Custom Widgets.
Use the widget area in your theme to display featured products, categories, or banners, improving navigation.
- Optimize for SEO.
Implement SEO best practices while creating pages, using keywords like “WooCommerce store” in titles and descriptions.
- Test Store Functionality.
Conduct a test purchase to confirm that all pages operate smoothly and users experience a convenient checkout process.
- Seek Customer Feedback.
Encourage customers to provide feedback on how to improve page layouts, simplifying adjustments in future updates.
- Regularly Update Content.
Keep content fresh and updated, revisiting page designs to ensure they reflect current promotions or inventory.
By following these steps, we can effectively customize our WooCommerce store, making it visually appealing and streamlined for our customers. For further assistance, we can refer to resources such as WooCommerce documentation or WordPress theme selector.
Key Takeaways
- Foundation Steps: Start by installing WordPress, which is crucial for smooth WooCommerce operation, followed by the WooCommerce plugin activation.
- Setup Wizard Importance: Utilize the WooCommerce setup wizard to enter essential store details like location, currency, and payment options for optimal configuration.
- Payment and Shipping Configuration: Actively choose and set up diverse payment methods (e.g., PayPal) and detailed shipping options to enhance customer satisfaction and ensure seamless transaction processes.
- Effective Product Management: Add detailed product listings, organize them into categories, and ensure high-quality images to maximize visibility and conversion rates.
- Customize for User Experience: Choose and tailor a WooCommerce-compatible theme that reflects your brand, adjusting colors and layouts to create an appealing customer experience.
- Test and Launch: Conduct a test purchase to ensure a smooth checkout process before officially launching your store; effective promotion strategies, such as social media marketing, are also essential for driving traffic.
Conclusion
Setting up a WooCommerce store can be an exciting journey for us as we venture into the world of online business. By following the steps outlined in this guide we can create a store that not only meets our needs but also provides an exceptional shopping experience for our customers.
From choosing the right hosting provider to customizing our store’s appearance we’ve covered essential aspects that contribute to our store’s success. Remember to regularly test functionality and seek feedback to continuously improve our offerings.
With dedication and attention to detail we’re well on our way to establishing a thriving WooCommerce store. Let’s embrace the opportunities ahead and watch our business grow.
Frequently Asked Questions
What is WooCommerce?
WooCommerce is a powerful plugin that turns a WordPress website into a fully functional online store. It helps you manage products, payments, and shipping while providing tools to enhance the shopping experience.
How do I install WooCommerce?
To install WooCommerce, first ensure that you have WordPress installed. Then, go to the WordPress dashboard, navigate to the “Plugins” menu, search for “WooCommerce,” and click “Install Now.” After installation, activate the plugin and follow the setup wizard.
What are the system requirements for WooCommerce?
WooCommerce requires the latest version of WordPress, a compatible hosting provider, and an HTTPS connection for security. Ensure that your server meets the necessary PHP and MySQL versions.
How do I add products to my WooCommerce store?
You can add products by navigating to the “Products” section in your WooCommerce dashboard. Click on “Add New,” then enter your product details, including title, description, price, and images. Organize products into categories for better navigation.
How can I customize my WooCommerce store?
You can customize your WooCommerce store by selecting a compatible theme, adjusting theme settings, adding your logo, and modifying page layouts. Make sure the design aligns with your brand identity.
What payment gateways can I use with WooCommerce?
WooCommerce supports various payment gateways such as PayPal, Stripe, and credit card payments. You can set up and manage these options in the WooCommerce settings under the “Payments” tab.
How do I configure shipping options in WooCommerce?
To configure shipping options, go to the WooCommerce settings, find the “Shipping” tab, and create shipping zones. Set your shipping methods and rates based on your target market and preferences.
Why is SEO important for my WooCommerce store?
SEO is crucial for improving your store’s visibility on search engines, attracting more visitors. Optimizing product descriptions, images, and meta tags can significantly enhance your online presence and drive sales.
Should I conduct a test purchase before launching?
Yes, conducting a test purchase is essential to ensure the checkout process works smoothly. It helps you detect any issues that may hinder customer experience and allows you to make necessary adjustments.
How can I gather customer feedback on my WooCommerce store?
You can gather customer feedback through surveys, product reviews, and direct communication. Incorporating feedback helps improve your store’s functionality and enhance the overall customer experience.
Leave a Reply