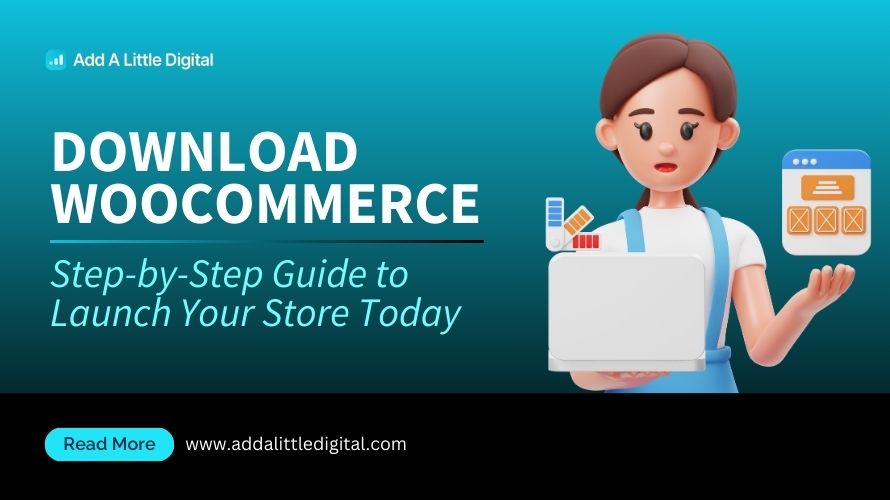
Overview of WooCommerce
- Understand WooCommerce: WooCommerce is a powerful WordPress plugin designed for online businesses. It enables us to turn any WordPress site into a fully functional e-commerce store. Given its flexibility and scalability, it’s ideal for businesses of all sizes.
- Visit WooCommerce’s Official Website: To download WooCommerce, we start by going to the WooCommerce website. This site offers all the resources and tools necessary for a successful download.
- Download the Plugin: On the official website, we find the download button for the plugin. Click on “Get Started” or the equivalent prompt to obtain the latest version of WooCommerce. Ensure the downloaded file is in a .zip format.
- Log Into Your WordPress Dashboard: Before installation, we log into the WordPress admin dashboard for our site. This access is crucial for uploading and managing the WooCommerce plugin.
- Upload the Plugin: In the dashboard, we navigate to “Plugins” and then select “Add New.” Next, we click on “Upload Plugin” and choose the .zip file we downloaded earlier. Clicking the “Install Now” button initiates the installation process.
- Activate the Plugin: Once installed, we’ll see an “Activate” link. We click on it to activate WooCommerce on our site. This step enables all WooCommerce functionalities, making our online store ready to showcase products.
- Configure Basic Settings: After activation, a setup wizard appears. We input essential details like store location, currency, and payment method preferences. Completing this configuration establishes the foundation for our online business operations.
- Add Products: Now, we proceed to add products. From the dashboard, we select “Products,” then “Add New.” Here, we can enter product names, descriptions, prices, and other relevant details for our inventory.
- Customize Store Design: To enhance user experience, we can customize the appearance of our store. We explore “Appearance” in the dashboard to select or modify themes. A visually appealing site attracts more customers.
- Launch Our Store: After configuring settings and adding products, we prepare to launch our store. Double-check all elements to ensure functionality and aesthetics are seamless. Finally, we promote our store through various marketing channels.
By following these steps, we can download WooCommerce and set up our e-commerce site efficiently. This process ensures we utilize WooCommerce’s capabilities to boost our online business presence.
Benefits of Downloading WooCommerce
Downloading WooCommerce offers numerous advantages that can transform our e-commerce strategy. With this powerful plugin, we can enhance our website’s functionality and user experience significantly.
Easy Installation Process
- Visit the WooCommerce website
Navigate to the official WooCommerce site to access the latest version of the plugin.
- Download WooCommerce
Click the download button to retrieve the WooCommerce .zip file. This file contains everything necessary for installation.
- Log into WordPress
Access our WordPress dashboard with admin credentials to begin the installation.
- Upload the Plugin
Go to “Plugins” > “Add New.” Click “Upload Plugin” and select the downloaded .zip file.
- Activate WooCommerce
Once uploaded, click “Install Now.” After installation, select “Activate Plugin” to enable WooCommerce on our site.
- Follow the Setup Wizard
Upon activation, WooCommerce prompts a setup wizard. Follow the step-by-step guidance to configure basic settings.
- Customize Settings
Set essential parameters like store location, currency, and payment methods during the setup process.
- Finalize Installation
After completing the wizard, ensure all settings reflect our business needs. This ensures a smooth end-user experience.
Customization Options
- Choose a Theme
Select a WooCommerce-compatible theme that aligns with our brand. Various themes exist that enhance the visual appeal of our store.
- Add Product Listings
Navigate to “Products” > “Add New” to begin listing items for sale. Include detailed descriptions, images, and prices to attract customers.
- Configure Product Categories
Organize products into categories for easier navigation. This improves the shopping experience for customers.
- Utilize Extensions
Explore WooCommerce extensions to add functionalities like advanced payment options or shipping calculators. These extensions provide enhanced capabilities for our store.
- Personalize Design Elements
Modify the store’s layout, colors, and fonts through the WordPress customizer. A cohesive visual identity improves customer trust.
- Install Essential Plugins
Consider installing plugins that improve SEO, speed, and functionality. This can increase visibility and user satisfaction.
- Set Up Marketing Tools
Utilize built-in marketing tools, such as email marketing integrations. These tools help us reach customers effectively.
- Monitor and Adjust
Regularly analyze store performance to identify areas for improvement. Adapt our customization to align with customer feedback and trends.
By following these outlined steps, we can fully leverage the benefits of downloading WooCommerce, making our e-commerce journey enjoyable and effective.
How to Download WooCommerce
Downloading WooCommerce is straightforward and can be done in just a few simple steps. We’ll guide you through the process to ensure you get started quickly and efficiently.
System Requirements
- Check WordPress Version
WooCommerce requires WordPress version 5.0 or higher. Verify your WordPress version in your dashboard under “Updates.”
- Ensure PHP Compatibility
Make sure your server runs PHP version 7.2 or higher. This can usually be checked in your hosting account or through your server settings.
- Verify MySQL Version
We recommend MySQL version 5.6 or higher. This ensures optimal performance and security for WooCommerce.
- Confirm HTTPS Support
Ensure your website supports HTTPS. A secure connection is vital for transactions and customer data protection.
Step-by-Step Guide
- Visit the Official WooCommerce Site
Go to WooCommerce.com. This is the trusted source to download the plugin.
- Click on the “Get Started” Button
You’ll see a prominent “Get Started” button on the homepage. Clicking it directs you to download options.
- Select “Download WooCommerce”
Find the “Download” option. Select it to start downloading the WooCommerce plugin in .zip format.
- Log into Your WordPress Dashboard
Navigate to your WordPress admin panel. Use your credentials to log in quickly, which gets you ready for the next steps.
- Go to Plugins > Add New
In your dashboard menu, navigate to “Plugins” and then “Add New.” This section allows you to upload new plugins.
- Upload the WooCommerce .zip File
Click on “Upload Plugin.” After that, select the WooCommerce .zip file you downloaded earlier.
- Press “Install Now”
Once the file is uploaded, click “Install Now.” This automatically adds the WooCommerce functionalities to your site.
- Activate the Plugin
After installation, click “Activate Plugin.” This step makes WooCommerce active on your website.
- Follow the Setup Wizard
A setup wizard appears after activation. Follow the on-screen instructions to configure essential settings, like currency, payment, and shipping options.
- Finalize Settings and Add Products
Customize any other settings through WooCommerce > Settings. Start adding your products by navigating to Products > Add New.
By following these steps, we can assure you that downloading WooCommerce is a quick process. You’ll soon have a fully functional e-commerce platform ready for your business.
Setting Up WooCommerce After Download
Setting up WooCommerce immediately after downloading is crucial for launching our e-commerce store. Follow these steps for a smooth configuration process.
Configuring Settings
- Access Settings: Log into your WordPress dashboard. Look for the “WooCommerce” tab in the left sidebar and click on it. This section hosts all essential configuration options.
- Run the Setup Wizard: After activating WooCommerce, a setup wizard appears. Click “Run the Setup Wizard” to initiate the initial configuration.
- Store Details: Enter our store’s address, including country, city, and postal code. This information is vital for shipping calculations and tax settings.
- Currency Settings: Select the currency for transactions. Ensure it matches our target market. This setting is crucial for customer familiarity.
- Payment Options: Choose our preferred payment methods. WooCommerce supports PayPal, Stripe, and other gateways. Check the boxes for the methods we’d like to enable.
- Shipping Options: Define our shipping zones and rates. This allows us to provide accurate shipping costs based on customer locations.
- Finalize: After completing all sections, click “Finish Setup.” We can revisit settings later if needed.
- Customize Settings: Explore remaining settings under the “WooCommerce” > “Settings” area. Adjust tax rates, enable coupons, or set up product visibility.
Adding Products
- Navigate to Products: In our dashboard, find the “Products” tab and click it. This section allows us to manage and add new products easily.
- Add New Product: Click “Add New.” This action opens the product creation page.
- Input Product Name: Write a clear, concise title for our product. This name appears in listings and should be SEO-friendly.
- Description and Details: Enter a detailed description. Highlight key features and benefits. Use bullet points for easier readability. Our main keyword “download WooCommerce” can seamlessly fit into this section.
- Set Product Data: Choose between simple or variable products. For variable products, specify attributes like size or color.
- Pricing: Set a price for our product. Consider competitive pricing—this can improve sales.
- Product Images: Upload high-quality images. Visuals are vital for e-commerce; they help customers make informed purchasing decisions.
- Categories and Tags: Assign categories and relevant tags. These help structure our product catalog and enhance product discoverability.
- Publish: Once everything is filled out, click “Publish.” Our product is now live on the store.
- Review Products: Periodically check product details and optimize listings. Adjust pricing or add promotional information based on performance analytics.
By following these steps, we efficiently set up WooCommerce and make our products accessible to potential customers. For more insights, refer to the WooCommerce documentation, set up business methodology, or business improvement strategies.
Key Takeaways
- Understanding WooCommerce: WooCommerce is a versatile WordPress plugin that transforms any WordPress site into a fully functional online store, suitable for businesses of all sizes.
- Simple Download Process: Download WooCommerce by visiting the official WooCommerce website and clicking the “Get Started” button to acquire the latest .zip file.
- Easy Installation Steps: Log into your WordPress dashboard, navigate to “Plugins,” choose “Add New,” then “Upload Plugin” to install WooCommerce, followed by clicking “Activate.”
- Setup Wizard Configuration: After activation, complete the setup wizard to configure essential details like store location, currency, and payment methods for smooth business operations.
- Product Management: Add and manage products effectively by using the “Products” section, where you can list new products, describe them clearly, and organize them into categories.
- Visual Customization: Enhance your online store’s appeal by selecting a suitable theme and customizing design elements to improve user experience and boost customer engagement.
Conclusion
Getting started with WooCommerce opens up a world of possibilities for our e-commerce ventures. By following the steps outlined in this guide we can effectively set up our online store and customize it to meet our unique needs.
With its user-friendly interface and powerful features WooCommerce empowers us to create a seamless shopping experience for our customers. As we launch our store it’s crucial to stay engaged with our audience and continuously optimize our offerings.
Let’s embrace the journey of building our e-commerce presence with WooCommerce and watch our businesses thrive.
Frequently Asked Questions
What is WooCommerce?
WooCommerce is a powerful WordPress plugin that enables you to create and manage an online store. It provides essential features like product listings, payment processing, and inventory management, making it suitable for businesses of all sizes.
How do I download WooCommerce?
You can download WooCommerce from the official WooCommerce website. Simply visit the site, navigate to the download section, and select the plugin. Ensure the file is in .zip format to proceed with installation.
How do I install WooCommerce?
To install WooCommerce, log into your WordPress dashboard, go to Plugins > Add New, upload the downloaded .zip file, and click on Install. After installation, activate the plugin to enable its functionalities.
What is the setup wizard in WooCommerce?
The setup wizard in WooCommerce guides you through the initial configuration process. It helps you set up essential store settings like store location, currency, payment methods, and shipping options to get your online store running smoothly.
How do I add products to my WooCommerce store?
To add products, go to the Products section in your WordPress dashboard, click on “Add New,” and fill in product details such as name, description, price, and images. You can also categorize and tag products for better organization.
What are WooCommerce-compatible themes?
WooCommerce-compatible themes are WordPress themes designed to seamlessly integrate with WooCommerce. They enhance the aesthetics and functionality of your online store, providing a better user experience for your customers.
How can I promote my WooCommerce store?
Promoting your WooCommerce store can be done through various marketing channels, such as social media, email marketing, and SEO. Regularly creating engaging content and leveraging online ads can also enhance your store’s visibility.
How do I monitor my store’s performance?
You can monitor your store’s performance by utilizing analytics tools available in your WordPress dashboard or third-party services like Google Analytics. Regularly check metrics such as sales, traffic, and customer feedback to make necessary adjustments.
Leave a Reply